Beginner Stained Glass Basics: Copper Foil Guide
Stained glass has a reputation. Hear the words and most people picture medieval cathedrals, leaded windows, and somebody with decades of training. I want to gently push back on that. The copper foil method — the one most hobbyists start with — is genuinely forgiving, and you can make a small suncatcher on your kitchen table in an afternoon. Slow, meditative work. And it ends with something you can hang in a window and show off. Let’s make one together. basics-a-beginners-guide/”>Linocut Printing Basics.
Materials List
- Glass — start with 3mm art glass. Can’t get to a stained glass supplier? A local glazier’s offcuts or even picture-frame glass will do for practice. Thrifted glass plates work too, though they cut less predictably.
- Glass cutter — a decent carbide wheel cutter, around £15–25. Skip the cheapest ones; they skip and chatter.
- Running pliers — for snapping clean breaks. Don’t substitute regular pliers; the curved jaws matter.
- Grozing pliers — for nibbling away stubborn edges. A cheap pair of flat-jawed pliers can work in a pinch, but go gently.
- Copper foil tape — 5mm or 6mm width for most projects. Buy a roll; you’ll use more than you think.
- Flux — liquid or paste. No real substitute here, I’m afraid.
- Solder — 60/40 tin-lead is easiest for beginners. Lead-free works but runs hotter and fussier.
- Soldering iron — 100W minimum for stained glass. A 60W craft iron will struggle and frustrate you. Check secondhand listings; they come up often.
- Safety gear — safety glasses (non-negotiable), nitrile gloves for flux, and a well-ventilated space. No exceptions on the glasses.
- Glass cleaner and paper towels — for cleaning flux residue.
- Pattern and marker — a simple design on paper, plus a fine permanent marker.
- Patina (optional) — black or copper patina to darken the solder lines. Plain solder looks silver and that’s fine too.
Step-by-Step
- Design your pattern. Keep it small for your first go — a 15cm square or a simple leaf shape. Draw it on paper, then draw a second copy. One is your cutting template, one is your layout guide. Avoid curves tighter than a 5p coin; sharp inside corners are a beginner’s nightmare.
- Number your pieces. Label each shape on the pattern and mark the colour and grain direction. Grain matters — glass has a subtle directional texture, and if you ignore it, your finished piece will look patchy.
- Cut the paper templates. Cut just inside the line, about 1mm smaller than the drawn shape. This gap is your copper foil allowance.
- Score the glass. Lay your glass on a flat, clean surface. Place the template underneath or trace around it with a marker. Run the cutter firmly along the line once — once, with steady pressure. You should hear a light zipping sound. Don’t go back over it.
- Break the glass. Grip the glass with the score line over a table edge, or use running pliers on the score. Apply gentle, even pressure. It should snap with a soft click. If it doesn’t, don’t force it — re-score and try again.
- Groz the edges. Nibble away any bumps with grozing pliers so the piece sits flat and matches your template. Small chips along the edge are fine; they’ll be hidden under foil.
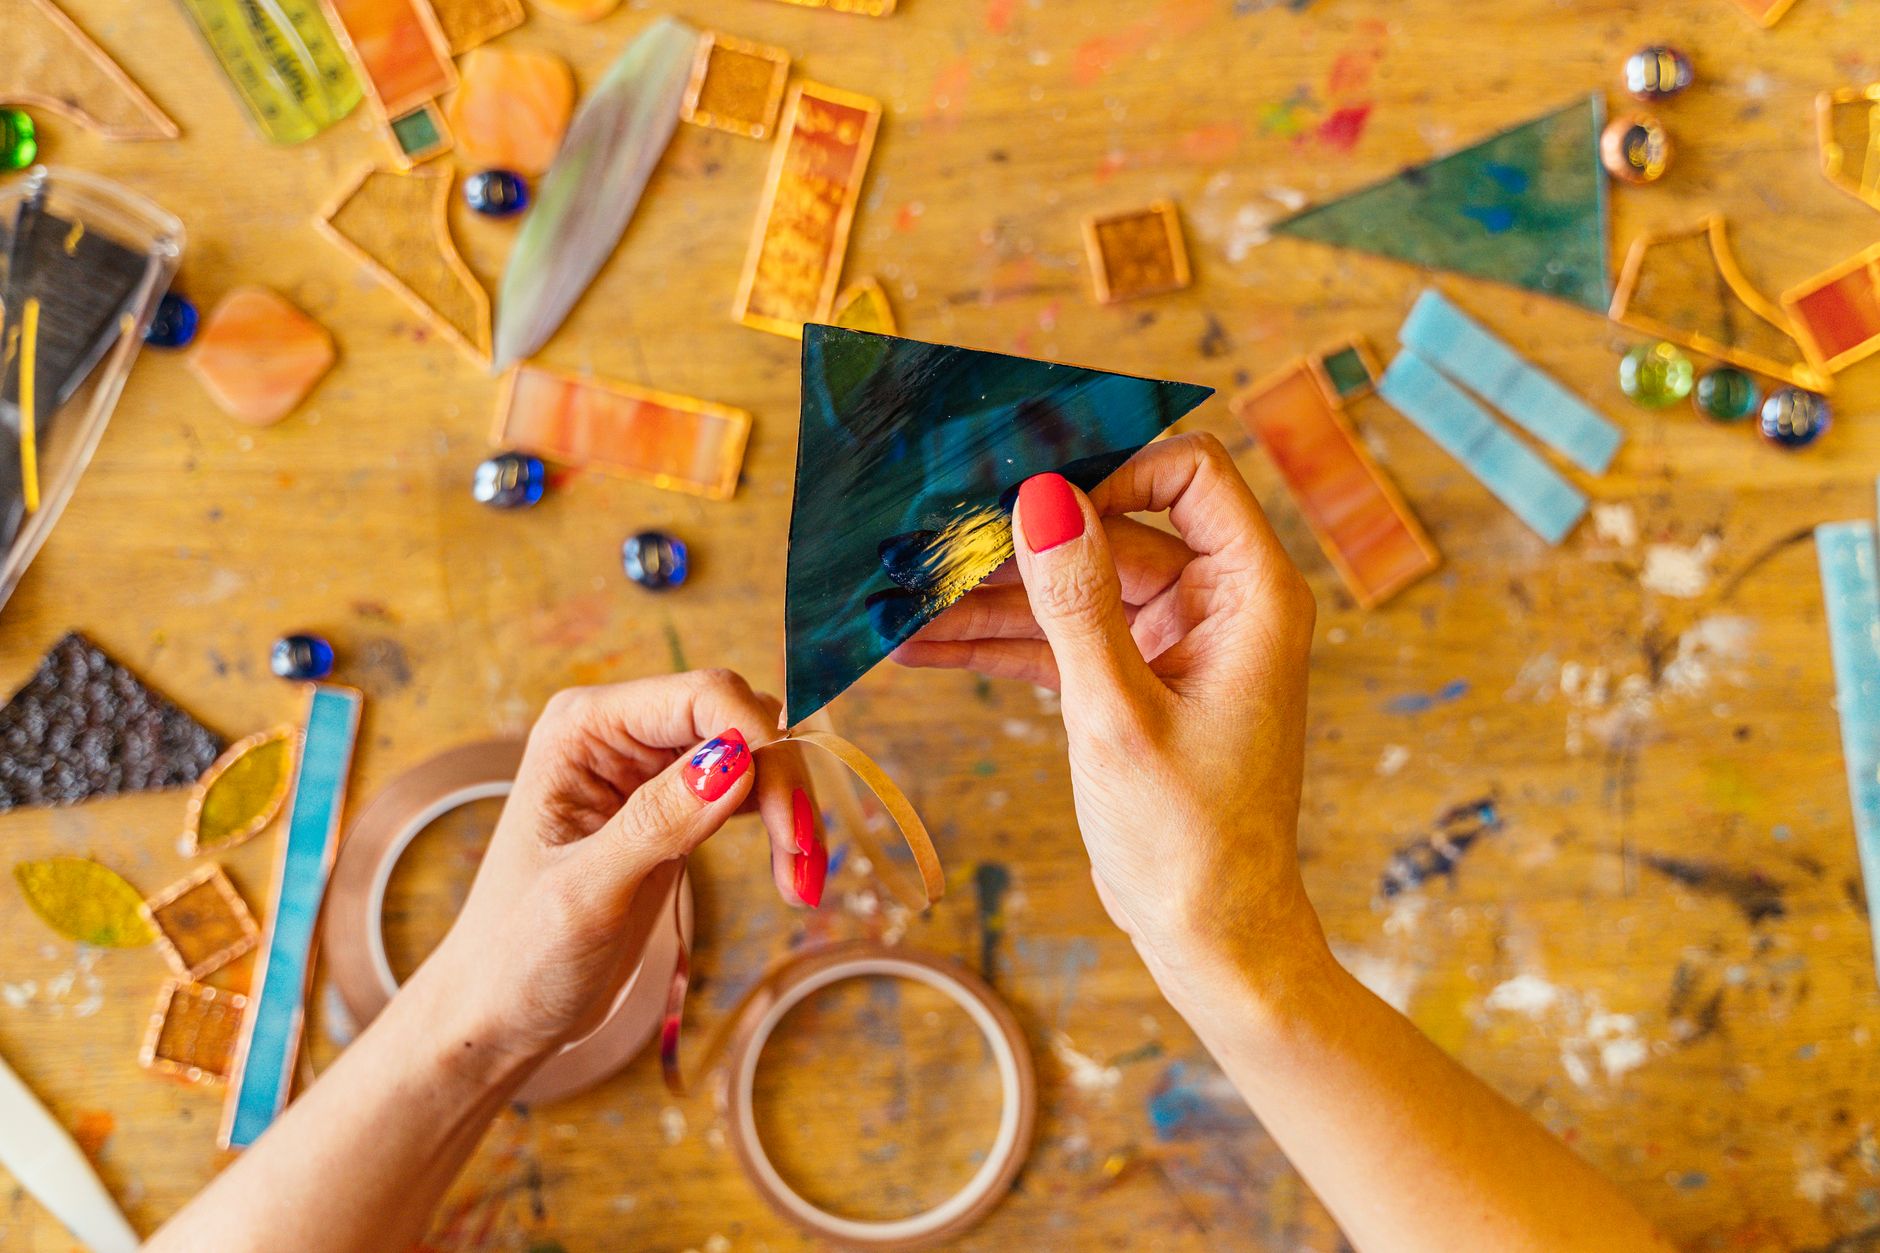
- Wrap each piece in copper foil. Peel a length of foil, centre the glass edge, and press it down evenly on both sides. Burnish it flat with a fingertip or a small wooden tool. Overlap the ends at corners and press them smooth. Every edge needs foil — miss one and the solder won’t hold.
- Lay out the design. Arrange the foiled pieces on your pattern copy, foil sides touching. Check the fit. Trim or re-groz any piece that pushes its neighbours out of place.
- Apply flux. Brush a thin coat of flux along the foil seams. Thin is the word — a puddle of flux makes soldering a mess.
- Tack-solder the joints. Heat your iron fully, then touch solder to each seam to hold the pieces together. Just small dots for now. Check the piece is flat before going further.
- Run the seams. Solder along every seam in smooth, continuous passes. Keep the iron moving. Aim for a rounded bead, not a lump.
- Flip and repeat. Turn the piece over, flux the back seams, and solder them the same way.
- Clean the flux. Scrub the piece with glass cleaner and a paper towel, or wash it gently with a soft brush. Flux left on will corrode the solder over time.
- Add a hanging loop. Solder a small loop of wire to the top edge, or attach a ring at a corner. Let it cool fully before hanging.
- Patina if you like. Apply patina to the solder lines with a cotton bud, let it darken, then rinse and dry. Wear gloves.

Beginner Tips
Score once, break once. The single biggest mistake I see is going over a score line a second time. That dulls the cut and makes the break ragged. Trust the first pass.

Don’t skimp on foil width. Narrow foil looks neat but gives the solder almost nothing to grip. 5mm or 6mm is your friend.
Keep your iron hot enough. If your solder sits in blobs and won’t flow, the iron is too cool or the tip is dirty. Wipe the tip on a damp sponge and let the iron come back up to temperature.
Work on a surface you can sacrifice. Solder drips, glass chips and flux stains happen. An old chopping board is perfect.
Here’s the counter-intuitive bit: your first piece should be a bit ugly. I mean that. If you spend your first session chasing perfection, you’ll get frustrated and quit. Make a wobbly little leaf, hang it up, and learn from the wobbles.
And keep your workspace ventilated. Solder fumes aren’t something to shrug off. Open a window, use a small fan, and take breaks.
Creative Variation
Once you’ve made a plain piece, try mixing textures. Combine a smooth glass with a heavily textured one — a seedy glass, a rippled glass, or a piece with a hammered surface. The solder lines catch light differently against each texture, and the whole thing comes alive in a window. You could also try using a single colour family across the piece, like five shades of green, so the shapes carry the design instead of the colour. It’s a lovely exercise in restraint, and it makes the finished suncatcher look far more deliberate than it was.
Troubleshooting
The glass won’t break cleanly. Your score probably wasn’t firm enough, or the glass has a hidden flaw. Re-score and try again. If it keeps failing, the glass may be tempered — tempered glass can’t be cut, so set it aside.
Pieces don’t fit together. Your templates were probably cut too large. Trim the paper template slightly, or groz the glass edges down. A millimetre or two makes a surprising difference.
Solder won’t stick. Either the iron is too cool or there’s no flux. Flux the seam again, clean the iron tip, and give it another go.
Lumpy solder lines. Too much solder, or the iron lingered in one spot. Run the iron back along the seam to smooth it, and keep it moving next time.
The piece won’t sit flat. One piece is slightly thicker or your seams are over-soldered on one side. Lay it on a flat surface and gently press while warm, or re-solder the problem seam thinner.
Flux residue won’t come off. Warm water and a drop of washing-up liquid with a soft brush will shift it. Dry thoroughly afterwards.
That’s it — you’ve made stained glass. It won’t be perfect, and that’s genuinely fine. The second one will be better, and the fifth will surprise you. Hang your first attempt somewhere you’ll see it, because the wobbles are proof you started. Grab a scrap of glass this week and make your first score. What are you going to put in your window?